Pleather Glitter Iron-on Gifts
Need an easy and personalized gift? Try making one of these super cute pleather glitter iron-on gifts. I’ve been trying to get my craft on and use my Cricut more. I LOVE my machine, but it’s always hard to find the time to make all the ideas I want to. Here are the very easy steps to customize a unique gift for friends, family, and loved ones. I love the way this project turned out so much that I will be making myself a set of bags once I have the time. See in 3 quick and simple steps how I made these pleather glitter iron-on gifts and how you can too!
3 Steps
- Pick the Perfect Pleather Accessories
- Cut Glitter Iron-On Design
- Iron-on Glitter Design
Pick the Perfect Pleather Accessory
Finding pleather (faux leather) hand bags, wallets, makeup bags, and totes is easy and affordable at stores like Wal-Mart and Target. Get a generic pleather accessory without branding or other words because the point of the project is to get your chosen pictures and words to personalize the gift. I love the coordinating metallic pleather stuff I found at Target. The bright pleather wristlets are from Target’s bullseye playground section.


Below are some options from Amazon if you prefer to have your chosen options shipped to your door.
Cut Glitter Iron-on Design
I chose my pineapple designs on the internet. Turning them into a SVG cut file was a snap with the Cricut design space. My Cricut Explore Air cut out the intricate designs so I didn’t have to. You can still easily do this project without a Cricut, though your designs will probably unable to be more intricate. You could do a bigger shape like a Mickey Mouse head, logo, or name without too much trouble. I recommend you print out your desired design, affix it to your glitter iron-on and cut them both out together. Just make sure your design is on the Glitter side of the iron-on if cutting manually by hand or you are using the mirror image cutting feature when using the Cricut as shown in the picture below.


These are the glitter iron-on sheets I bought on Amazon for this project and it came with a Teflon sheet for ironing.
Click the picture below for the official Cricut options for glitter iron-on. I personally recommend waiting until Cricut has sales or you get it through the monthly Cricut mystery box for the most affordable Cricut option.
Iron-on Glitter Design
Place the glitter iron-on design adhesive side down onto the pleather accessory. I placed a tabletop ironing board in the center of the bag for a smooth ironing surface and to prevent heating up the opposite side of the bag.

With the iron on the highest setting (without steam) apply heat in 6-10 second increments with a Teflon sheet for protection of the pleather bag until the design adheres to the bag. If you don’t have a teflon sheet then you can use a folded pillowcase

Once the glitter iron-on adheres to the bag then remove the sticky clear backing before it melts and iron the design again for 6 more seconds with the protective Teflon sheet over the glitter iron-on.

Be careful not to leave the iron in one place too long and do not push too hard or the iron will leave marks in the pleather.
Completed makeup bag with name and tote with pineapple design.

Reverse side of the make-up bag with a silver glitter pineapple.

I appreciate you checking out my blog and this DIY. Please let me know if you try out this project or if you have any questions or concerns.
Cricut Options:
Click pictures to go to the official Cricut website.
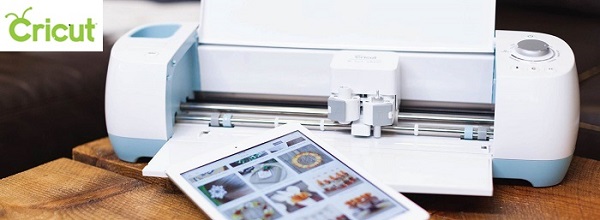
 I have the Cricut Explore Air in blue exactly as pictured.
Newer machine options include:
The Cricut Maker cuts fabric, wood, and tons of other materials with precision.
This post has affiliate links only for your convenience. You are not obligated to buy. If you do make a purchase using the links provided then I may make a small commission.


